Proxmox Lab: SIEM Environment
Project Tree / Roadmap
- Environment Setup
- Deployment of the VM for the Wazuh Environment
- Wazuh server installation & configuration
- Wazuh Agents Deployment
- Monitoring & Detections (coming soon)
Environment Setup
Host: Spare laptop • Hypervisor: Proxmox VE
Initial install completed with base configuration for network, storage, and web GUI access.
Install Proxmox & Node
- Node generated automatically as
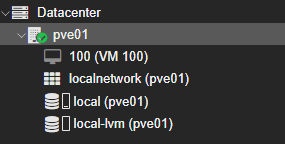
pve01upon Proxmox installation - Storage:
local (pve01),local-lvm (pve01) - ISO uploaded:
ubuntu-24.04.3-live-server-amd64.iso
Non-root Administrative User (Least Privilege)
Objective
Create a non-root administrative user secadmin@pve for daily management tasks, following least-privilege practices.
Steps
- Create User
Path:Datacenter → Permissions → Users → Add
Params: Usernamesecadmin• Realmpve• Enabled ✅ • Strong password set.
Result:secadmin@pvecreated. - Assign Role (ACL)
Path:Datacenter → Permissions → Add → User Permission
Params: Path/(cluster-wide) • Usersecadmin@pve• RolePVEAdmin(VM/storage/network mgmt; not root host control).
Result: Cluster-widePVEAdminrights. - Verification
Logged out and back in assecadmin@pve; confirmed ability to manage VMs, storage, networks.
System-Level Note
- Operations like creating network bridges require root privileges.
vmbr1was created asroot@pam; routine management performed assecadmin@pve.
Virtual Networking
Objective
Simulate a corporate environment with bridges:
- vmbr0: Management + Internet (home LAN)
- vmbr1: Isolated internal lab network
Steps
- Verify Existing Network
Host NIC:enp3s0(wired).
vmbr0bound toenp3s0, IP192.168.2.10/24. - Create Internal Bridge (vmbr1)
Asroot@pam: PathDatacenter → pve01 → System → Network → Create → Linux Bridge.
Params: Namevmbr1• Bridge ports: empty • IPv4/CIDR: empty • Autostart ✅.
Result:vmbr1created, Active = Yes.
Network Design
- vmbr0: Proxmox management, Internet access for VMs, Wazuh dashboard reachable from LAN.
- vmbr1: Isolated segment for endpoints (Windows/Linux/Kali). Only SIEM VM is dual-homed (vmbr0 + vmbr1).
Deployment of the VM for the Wazuh Environment
Base VM to host the Wazuh SIEM (VM 100).
Ubuntu VM Deployment
- ISO: Ubuntu Server 22.04 LTS uploaded to
local → ISO Images. - Create VM: Path
Datacenter → pve01 → Create VM
VM ID101• Namewazuh-siem• OS: Linux (ubuntu-22.04-server.iso)
System: BIOSSeaBIOS, Machinei440fx, SCSI CtrlVirtIO SCSI single
Disk:80 GBVirtIO onlocal-lvm• CPU:2 cores• RAM:6 GB
NICs: NIC1 → vmbr0 (LAN/Internet), NIC2 → vmbr1 (added post-install). - Ubuntu Install: Defaults for locale/storage; NIC1 DHCP; NIC2 unconfigured; created user with strong password; installed
OpenSSH Server; skipped snaps.
SIEM VM Network Configuration
Objective
Dual-home the SIEM:
ens18(vmbr0) → LAN via DHCPens19(vmbr1) → Static IP for lab
Steps
- Verify Interfaces
ip aens18: DHCP lease
192.168.2.155/24; ens19: DOWN, no IP. - Netplan Config
sudo nano /etc/netplan/01-netcfg.yamlnetwork: version: 2 ethernets: ens18: # LAN NIC (vmbr0) dhcp4: true ens19: # Lab NIC (vmbr1) addresses: - 10.10.10.1/24 - Apply & Verify
sudo netplan apply
ip a
ens18: DHCP
192.168.2.x; ens19: static10.10.10.1/24.
Notes
- LAN access to Wazuh dashboard via ens18.
- Lab endpoints will use
10.10.10.0/24via ens19. - Dual-homing keeps lab isolated yet manageable.
Wazuh GPG Key Import – Error & Fix
The GPG key is required so that apt can verify packages from the Wazuh repository are authentic and trusted before installation.
Objective
Place Wazuh GPG key at /usr/share/keyrings/wazuh.gpg prior to repo setup.
Issue
curl -s https://packages.wazuh.com/key/GPG-KEY-WAZUH | \
gpg --no-default-keyring --keyring gnupg-ring:/usr/share/keyrings/wazuh.gpg --import && \
chmod 644 /usr/share/keyrings/wazuh.gpg
gpg: failed to create temporary file '/usr/share/keyrings/...': Permission denied
gpg: keyblock resource '/usr/share/keyrings/wazuh.gpg': Permission denied
gpg: no writable keyring found: Not found
gpg: import from [stdin] failed: General error
gpg: Total number processed: 0Root Cause
gpg invoked with sudo but keyring write bypassed root; cannot write under /usr/share/keyrings/.
Resolution
curl -s https://packages.wazuh.com/key/GPG-KEY-WAZUH | gpg --dearmor | sudo tee /usr/share/keyrings/wazuh.gpg > /dev/null
sudo chmod 644 /usr/share/keyrings/wazuh.gpg
Using tee under sudo ensures the file is written with root privileges, avoiding the redirection permission issue.
We then discard what would be written to the console with > /dev/null
Verification
ls -l /usr/share/keyrings/wazuh.gpg
# -rw-r--r-- 1 root root <size> /usr/share/keyrings/wazuh.gpg
Notes
- One-liner from docs may fail on Ubuntu 22.04 due to stricter GPG/keyring handling.
- Using
teeis a reliable cross-version fix.
Next Up
- Wazuh server installation & configuration
- Agent deployment: Linux
- Log routing, dashboards, and detections (coming soon)